

What you’ll need
- Access to a Facebook account with permission in Meta Business Suite.
- Admin access to the Meta business portfolio (Business Manager) that owns the number’s WhatsApp account. Access to the Facebook Page alone is not enough.
- The WhatsApp number you’ll connect, with access to receive the verification code (SMS or call) — or the WhatsApp Business app already open on your phone.
- If you’ll keep using the WhatsApp Business app on your phone: the app updated to version 2.24.17 or later.
- A valid credit or debit card for Meta’s verification.
If the number is connected to another WhatsApp API provider, disconnect it
there before you start. Otherwise Meta blocks the connection. See
WhatsApp connection problems.
Start the connection in the Trainer
1
Start the connection
In the iZap AI Trainer, click the WhatsApp icon in the top-right corner of the
screen, next to your email address.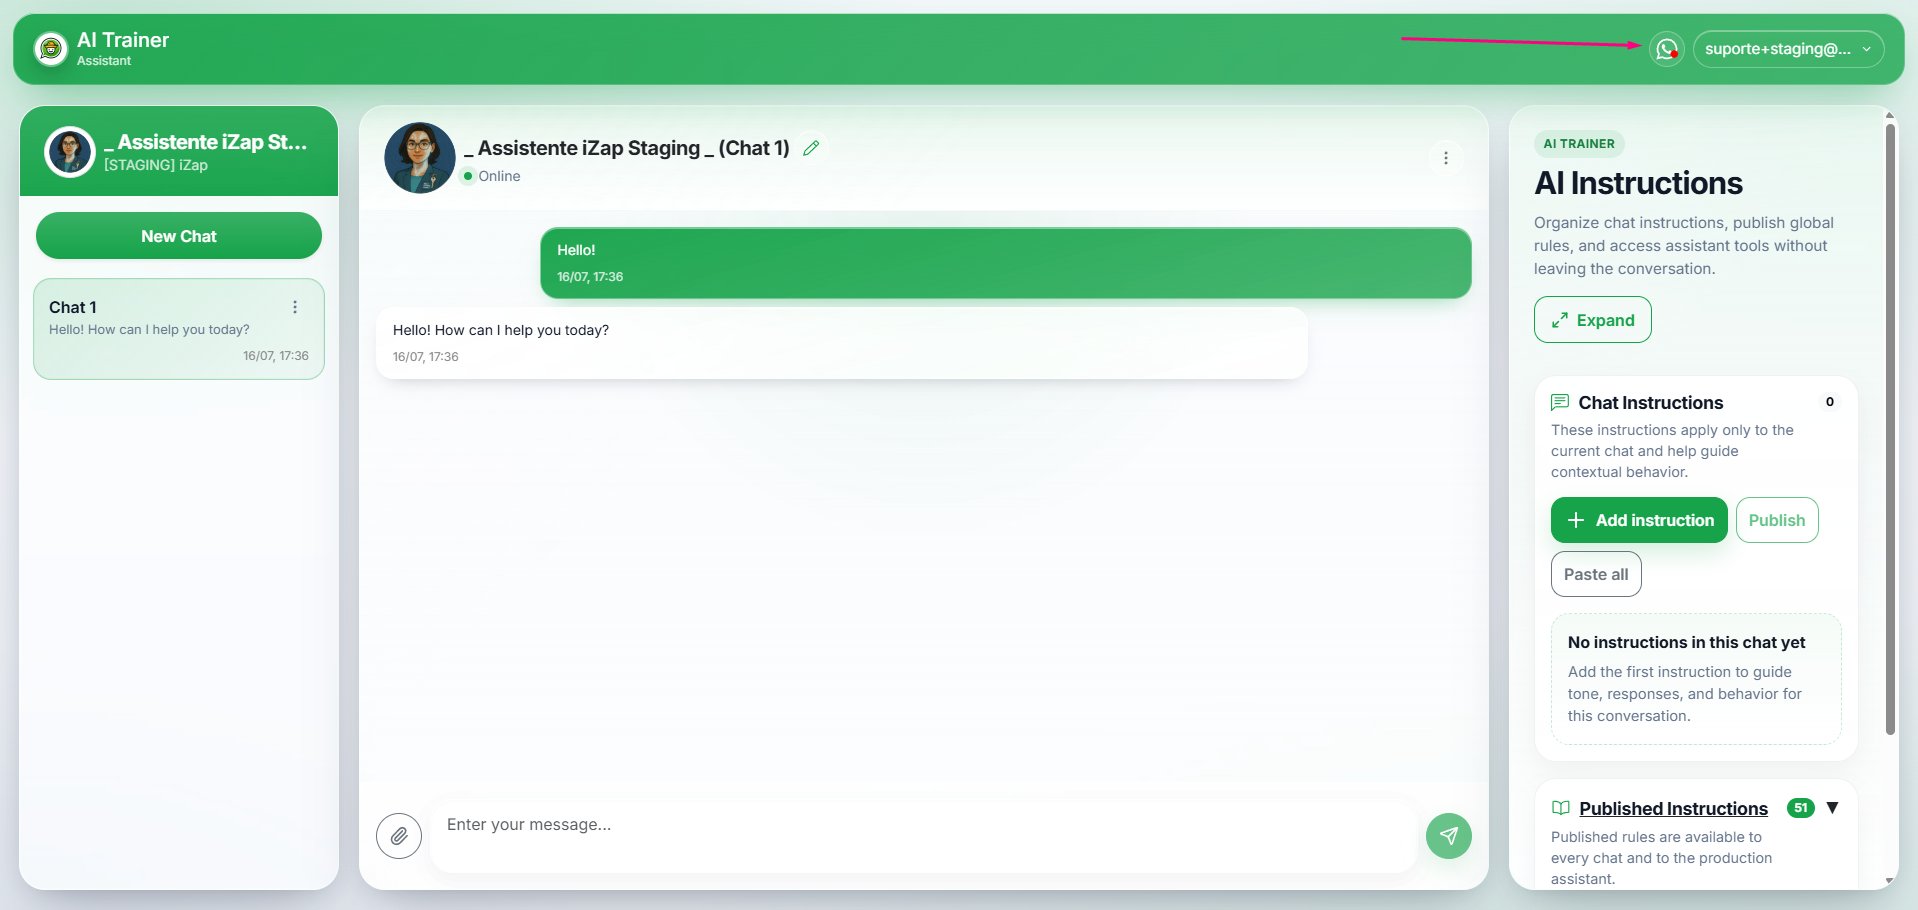
2
Confirm the redirect
The “You will be redirected” window explains that the button below opens the
official Facebook page so you can authorize the connection of your WhatsApp Cloud
with our system. Read the key information: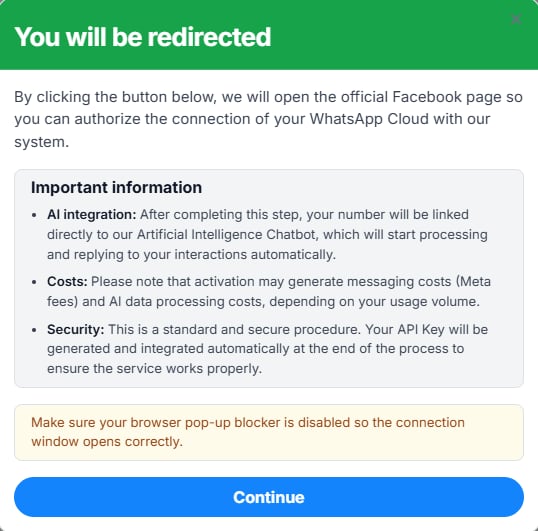
- AI integration: once this step is complete, your number is linked directly to our AI-powered chatbot, which begins processing and answering your interactions automatically.
- Costs: activation may generate messaging costs (Meta fees) and AI data-processing costs, depending on your usage volume.
- Security: this is a standard, secure procedure. Your API key is generated and integrated automatically at the end of the process.
3
Start onboarding
The “Onboarding” window explains that we need your authorization to manage a
WhatsApp number that belongs to you.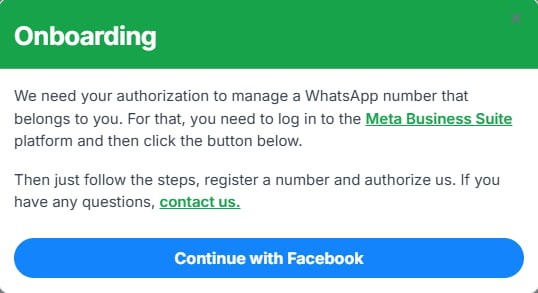
- Make sure you are logged in to Meta Business Suite.
- Click Continue with Facebook.
Set up the number on Meta
This is Meta’s official flow (Embedded Signup), with 11 steps.1
Log in and authorize Meta
Confirm your Facebook/Meta Business Suite login and authorize the WhatsApp
connection.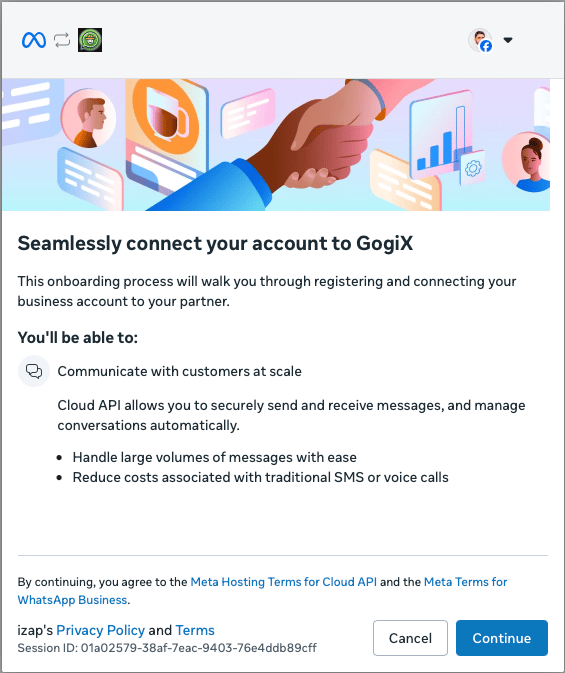
- Use the account that manages your business.
- The login happens on Meta’s own site.
- iZap never sees your password.
2
Choose the business portfolio
Select the business portfolio (Business Manager) that already exists or let
Meta create a new one for you.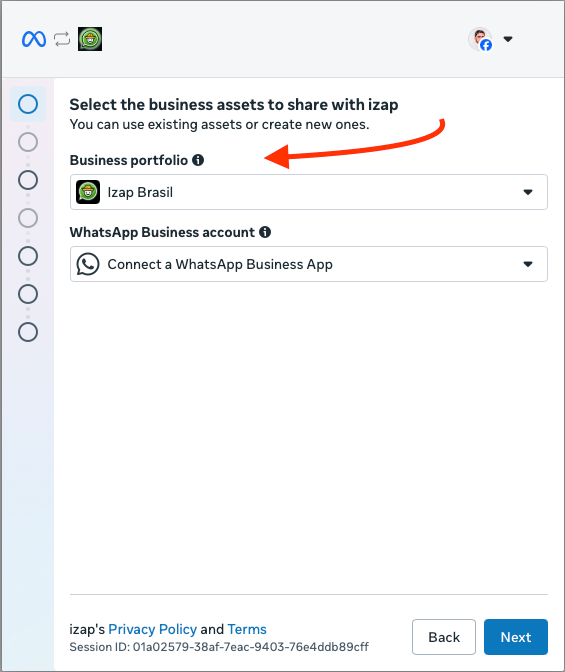
- Pick the portfolio that already owns your business.
- Don’t have one? Meta creates a new one right there.
- You can review the details before moving on.
3
Select the WhatsApp Business account
Click the WhatsApp Business account field and choose the account for this
number, or create a new one. There is no separate option for the WhatsApp
Business app: Meta detects it from the number in the next step.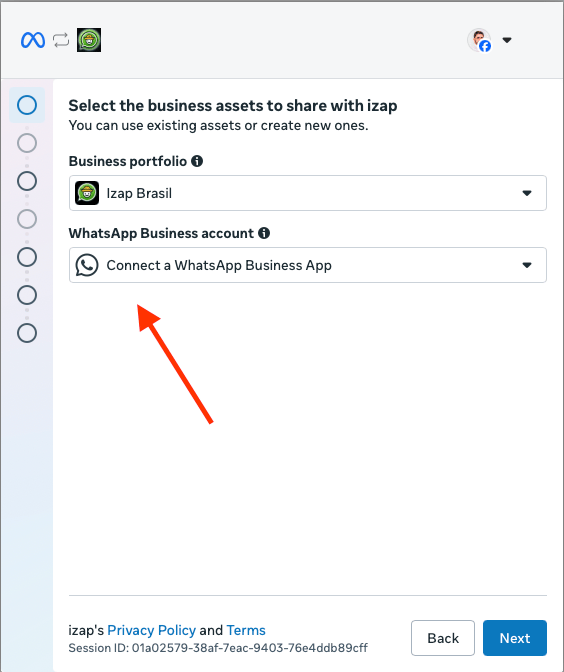
- Open the WhatsApp Business account field.
- The list shows the accounts you already manage.
- Choosing here doesn’t connect anything yet.
4
Enter your WhatsApp number
If Meta lists the number under Phone, select it. Otherwise, select the
country and type the WhatsApp Business number you’re going to connect.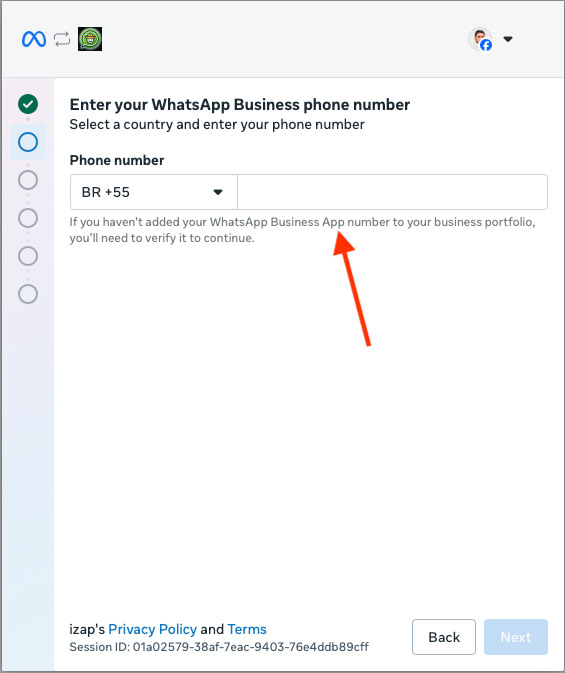
- Pick the country before typing.
- Type the full number, including the area code.
- It has to be a number you can access.
If the number is on the WhatsApp Business app, Meta detects the app and
shows a QR code instead of sending a verification code. Don’t accept a screen
that asks you to migrate the number or disconnect WhatsApp from your phone.
5
Click Next
After typing the number, review the note about connecting the WhatsApp
Business app you already use and click Next.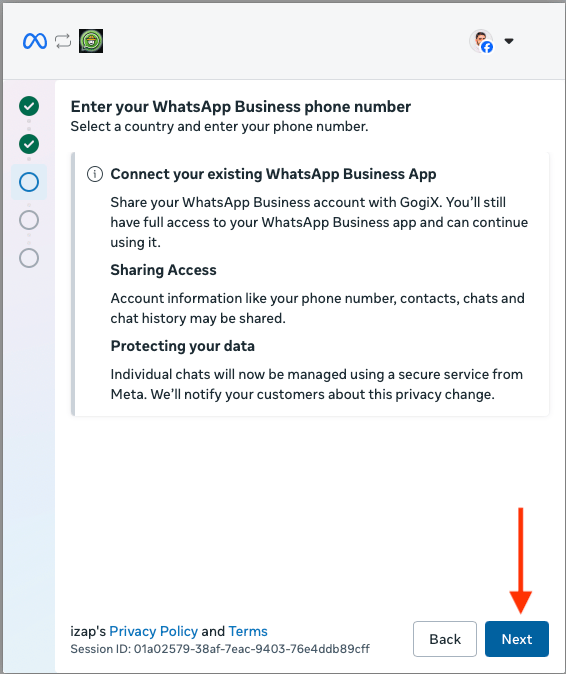
- Check the number before moving on.
- Read the note about the app you already use.
- Meta validates the number on the next screen.
6
Scan the QR code or use an access code
To import contacts and chat history, scan the QR code with WhatsApp Business
on your phone, or click Use an access code instead to connect by code.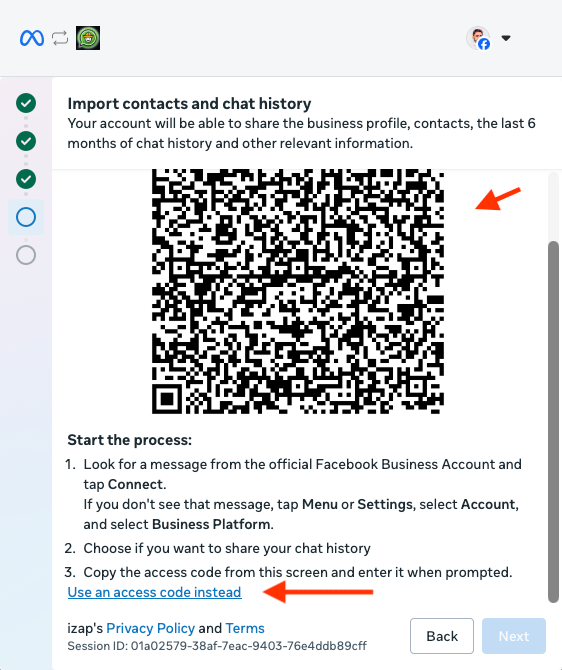
- Scan the QR code with WhatsApp Business on your phone.
- This imports your contacts and chat history.
- Phone not at hand? Use an access code instead.
Your phone needs WhatsApp Business open to scan the code.
7
Connect using the access code
If you choose to connect by code, copy the access code shown and enter it in
WhatsApp Business on your phone.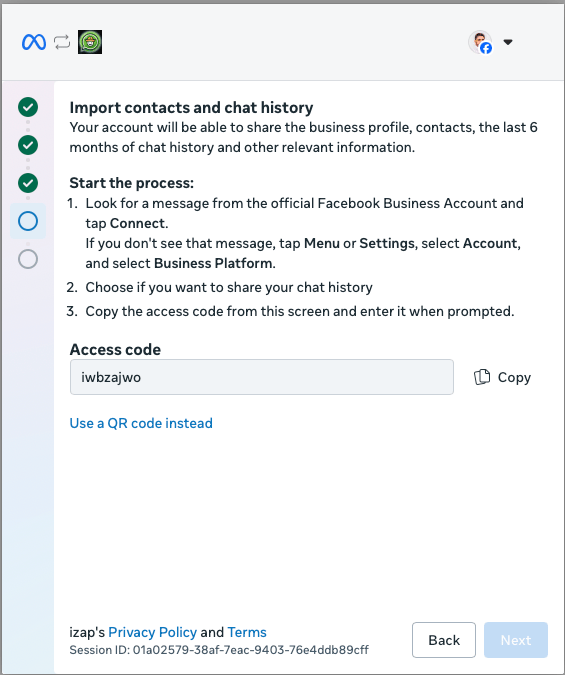
- Copy the code Meta shows on screen.
- Enter it in WhatsApp Business on your phone.
- You can go back to the QR code at any time.
8
Confirm the account details
Review the WhatsApp Business account name and select the timezone — this
screen shows up whether you connect via QR code or access code.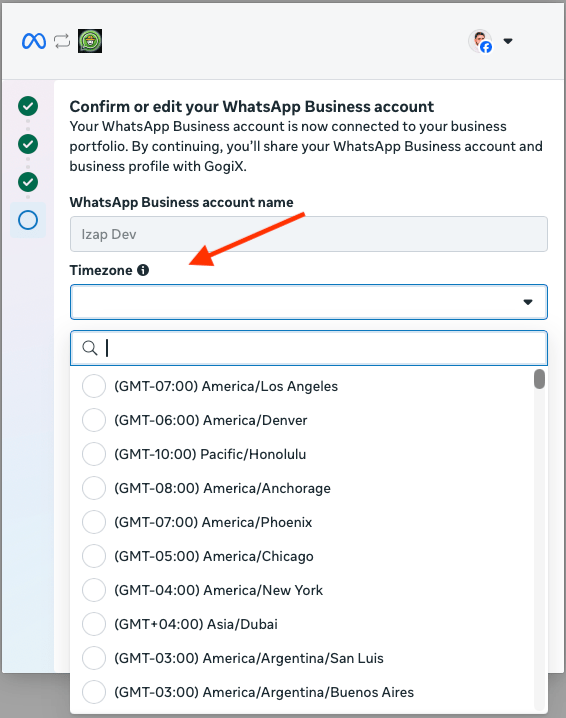
- Check the name your customers will see.
- Select your business’s timezone.
- This screen shows up on both paths, QR code or access code.
9
Review and confirm the sharing
Review what izap will be able to access and do with your WhatsApp Business
account, then click Confirm.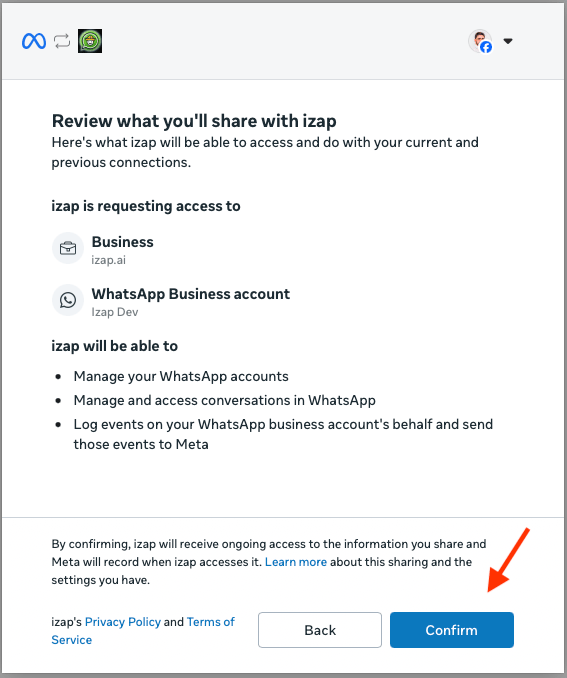
- Review what iZap will be able to access.
- These are the permissions needed to reply on your behalf.
- Click Confirm to finish.
10
Add a payment method
Your account is already connected to GogiX. Facebook requires a payment
method to review the number — click Add payment method to finish.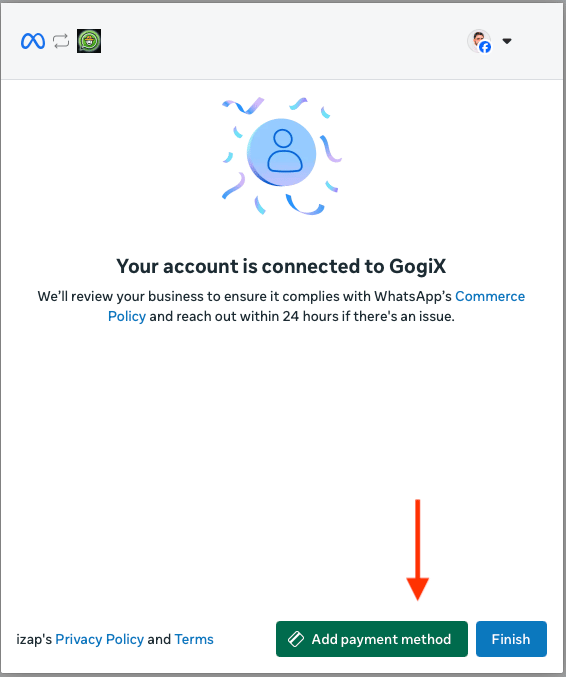
- The connection to iZap is already done.
- Meta requires a card to review the number.
- Without it, the number stays pending approval.
The payment method is registered with Meta, not with iZap.
Add a payment method
1
Set up payment on Meta
You are redirected to the “Billing and payments” screen in Meta Business Manager.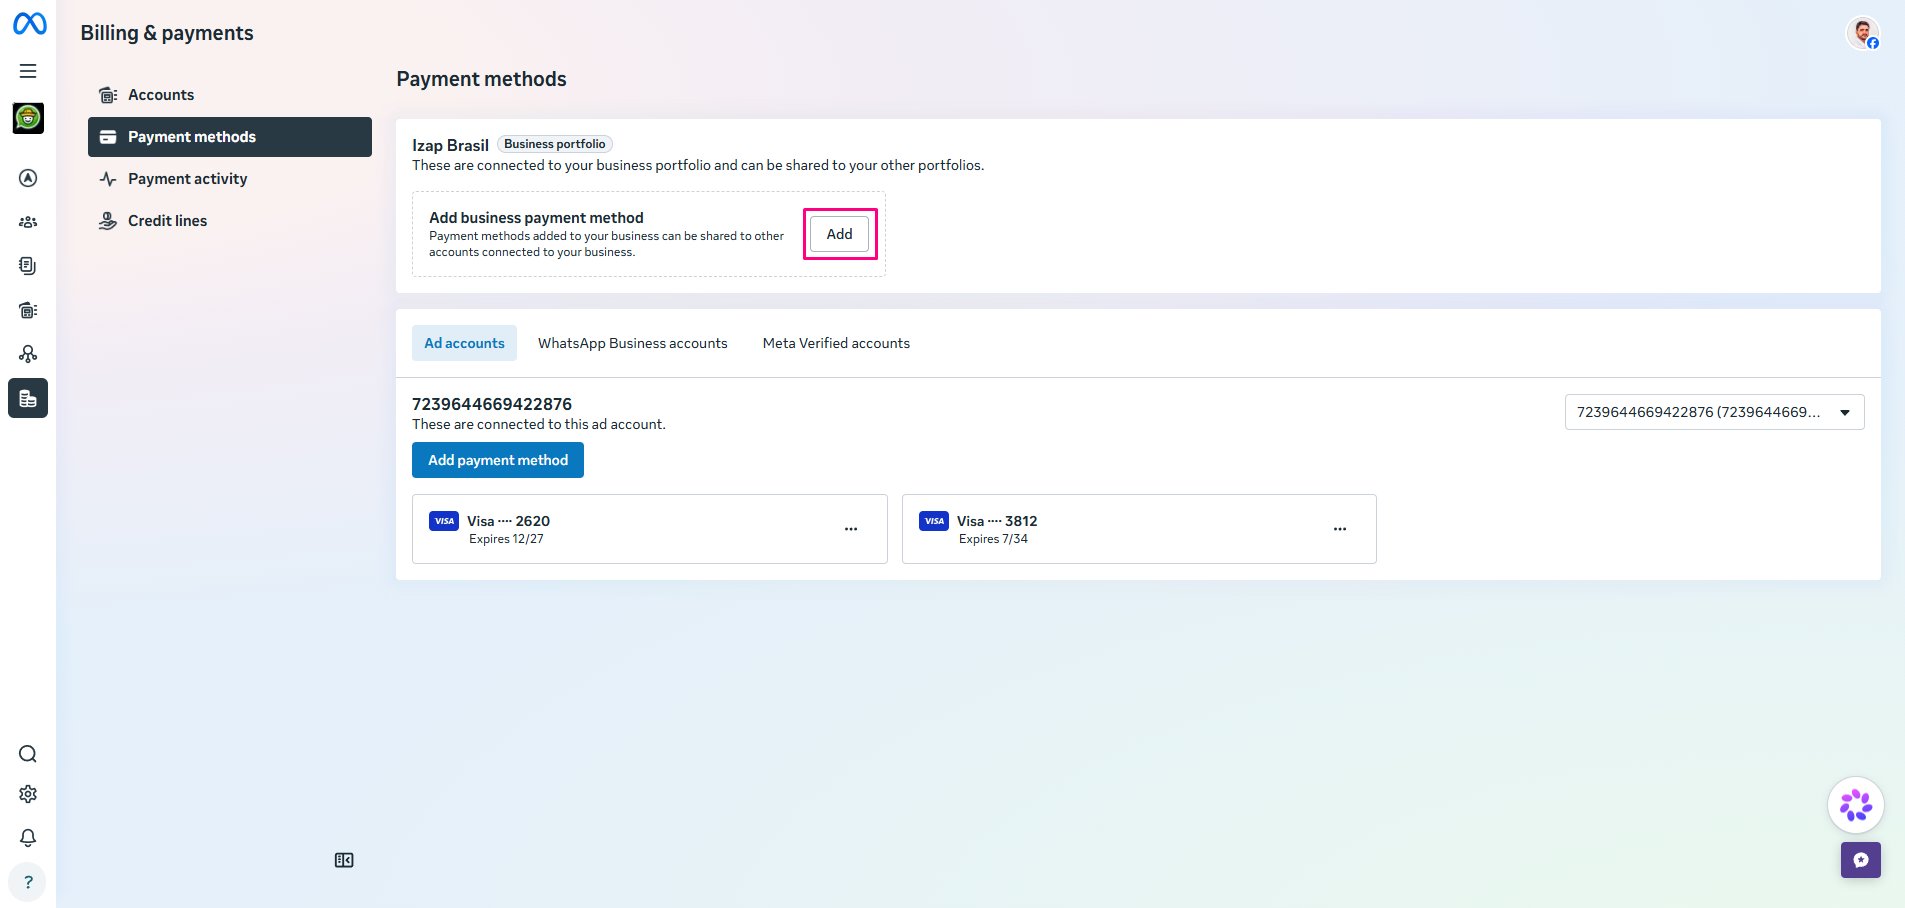
- Click the Add payment method button in the “Payment methods” section.
- Register a valid credit or debit card.
No charge is made to your card during this registration. This is a standard
account-verification procedure required by Meta.
If something goes wrong
- Meta showed an error, said there were too many attempts, or said the number is already linked: see WhatsApp connection problems.
- The connection finished, but the assistant doesn’t reply: see The assistant isn’t replying.
- The number was working and suddenly stopped: contact support before you redo the connection. Redoing the process during an outage can scramble the configuration that already exists.