> ## Documentation Index
> Fetch the complete documentation index at: https://docs.izap.ai/llms.txt
> Use this file to discover all available pages before exploring further.
# Connect WhatsApp to the AI Trainer
> Step-by-step guide to link your WhatsApp Cloud number to the iZap AI Trainer.
Follow these steps to connect your WhatsApp Cloud number to the iZap AI Trainer.
Once linked, your number is handled by the AI-powered chatbot, which processes and
answers your conversations automatically.
## Start the connection in the Trainer
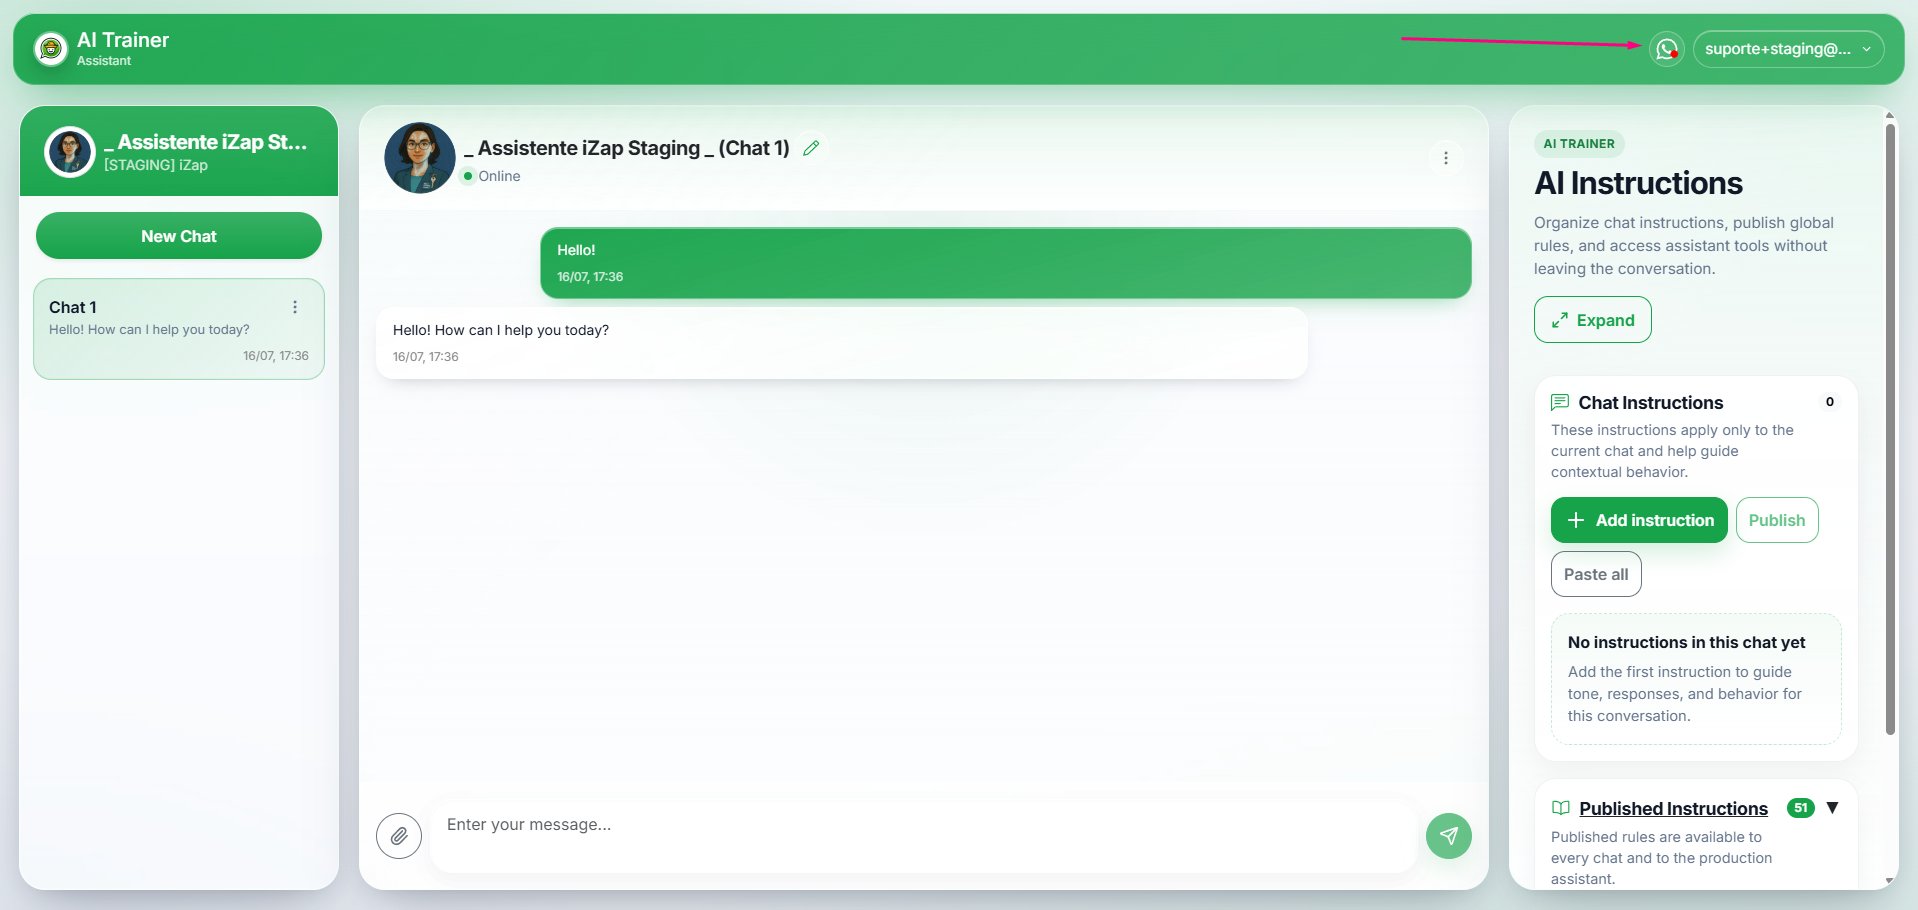
In the iZap AI Trainer, click the WhatsApp icon in the top-right corner of the
screen, next to your email address.
 The **"You will be redirected"** window explains that the button below opens the
official Facebook page so you can authorize the connection of your WhatsApp Cloud
with our system. Read the key information:
The **"You will be redirected"** window explains that the button below opens the
official Facebook page so you can authorize the connection of your WhatsApp Cloud
with our system. Read the key information:
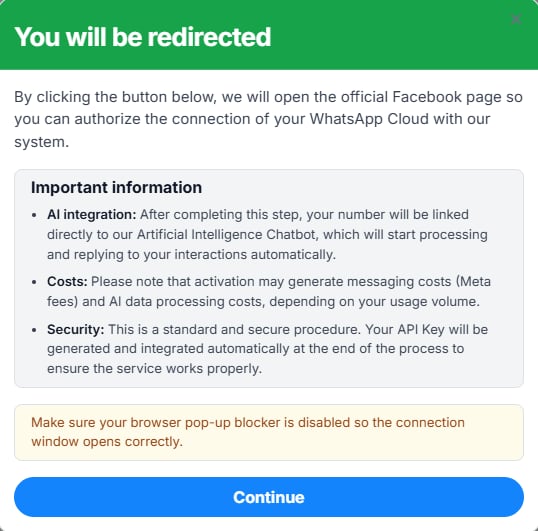 * **AI integration:** once this step is complete, your number is linked directly
to our AI-powered chatbot, which begins processing and answering your
interactions automatically.
* **Costs:** activation may generate messaging costs (Meta fees) and AI
data-processing costs, depending on your usage volume.
* **Security:** this is a standard, secure procedure. Your API key is generated
and integrated automatically at the end of the process.
Make sure your browser's pop-up blocker is disabled so the connection window can
open properly.
Click **Continue**.
The **"Onboarding"** window explains that we need your authorization to manage a
WhatsApp number that belongs to you.
* **AI integration:** once this step is complete, your number is linked directly
to our AI-powered chatbot, which begins processing and answering your
interactions automatically.
* **Costs:** activation may generate messaging costs (Meta fees) and AI
data-processing costs, depending on your usage volume.
* **Security:** this is a standard, secure procedure. Your API key is generated
and integrated automatically at the end of the process.
Make sure your browser's pop-up blocker is disabled so the connection window can
open properly.
Click **Continue**.
The **"Onboarding"** window explains that we need your authorization to manage a
WhatsApp number that belongs to you.
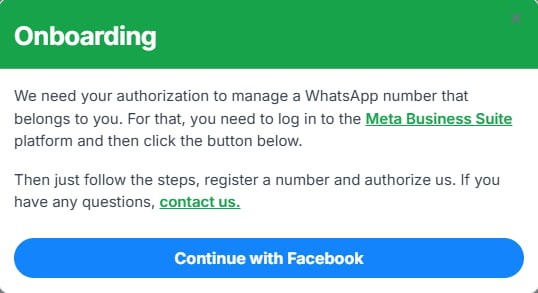 1. Make sure you are logged in to **Meta Business Suite**.
2. Click **Continue with Facebook**.
## Set up the number on Meta
A Meta/Facebook welcome screen appears with the title "Seamlessly connect your
account to GogiX". Read the information about permissions and click **Get
Started**.
On the "Fill in your business details" screen, select the Business Portfolio
(Business Manager) that will own the account:
* If you already have a Business Manager, select it from the list.
* If you don't, the system can create a new one.
Confirm the details and click **Next**.
Choose how you want to complete the integration, based on your number's history:
* **Connect your existing WhatsApp Business app:** if you already use or have
previously registered this number on WhatsApp Business.
* **Enter a new phone number…:** if your number has never been registered on any
WhatsApp Business app.
Click **Next**.
Select the country, type the area code + phone number, and click **Next**.
Confirm the WhatsApp Business account name and the time zone, then click **Next**.
Review the requested permissions and click **Continue**.
A QR code is displayed to import contacts and history. Scan it with your current
WhatsApp to authorize.
## Add a payment method
When you see the message "Your account is connected to GogiX", click the green
**Add payment method** button.
You are redirected to the "Billing and payments" screen in Meta Business Manager.
1. Make sure you are logged in to **Meta Business Suite**.
2. Click **Continue with Facebook**.
## Set up the number on Meta
A Meta/Facebook welcome screen appears with the title "Seamlessly connect your
account to GogiX". Read the information about permissions and click **Get
Started**.
On the "Fill in your business details" screen, select the Business Portfolio
(Business Manager) that will own the account:
* If you already have a Business Manager, select it from the list.
* If you don't, the system can create a new one.
Confirm the details and click **Next**.
Choose how you want to complete the integration, based on your number's history:
* **Connect your existing WhatsApp Business app:** if you already use or have
previously registered this number on WhatsApp Business.
* **Enter a new phone number…:** if your number has never been registered on any
WhatsApp Business app.
Click **Next**.
Select the country, type the area code + phone number, and click **Next**.
Confirm the WhatsApp Business account name and the time zone, then click **Next**.
Review the requested permissions and click **Continue**.
A QR code is displayed to import contacts and history. Scan it with your current
WhatsApp to authorize.
## Add a payment method
When you see the message "Your account is connected to GogiX", click the green
**Add payment method** button.
You are redirected to the "Billing and payments" screen in Meta Business Manager.
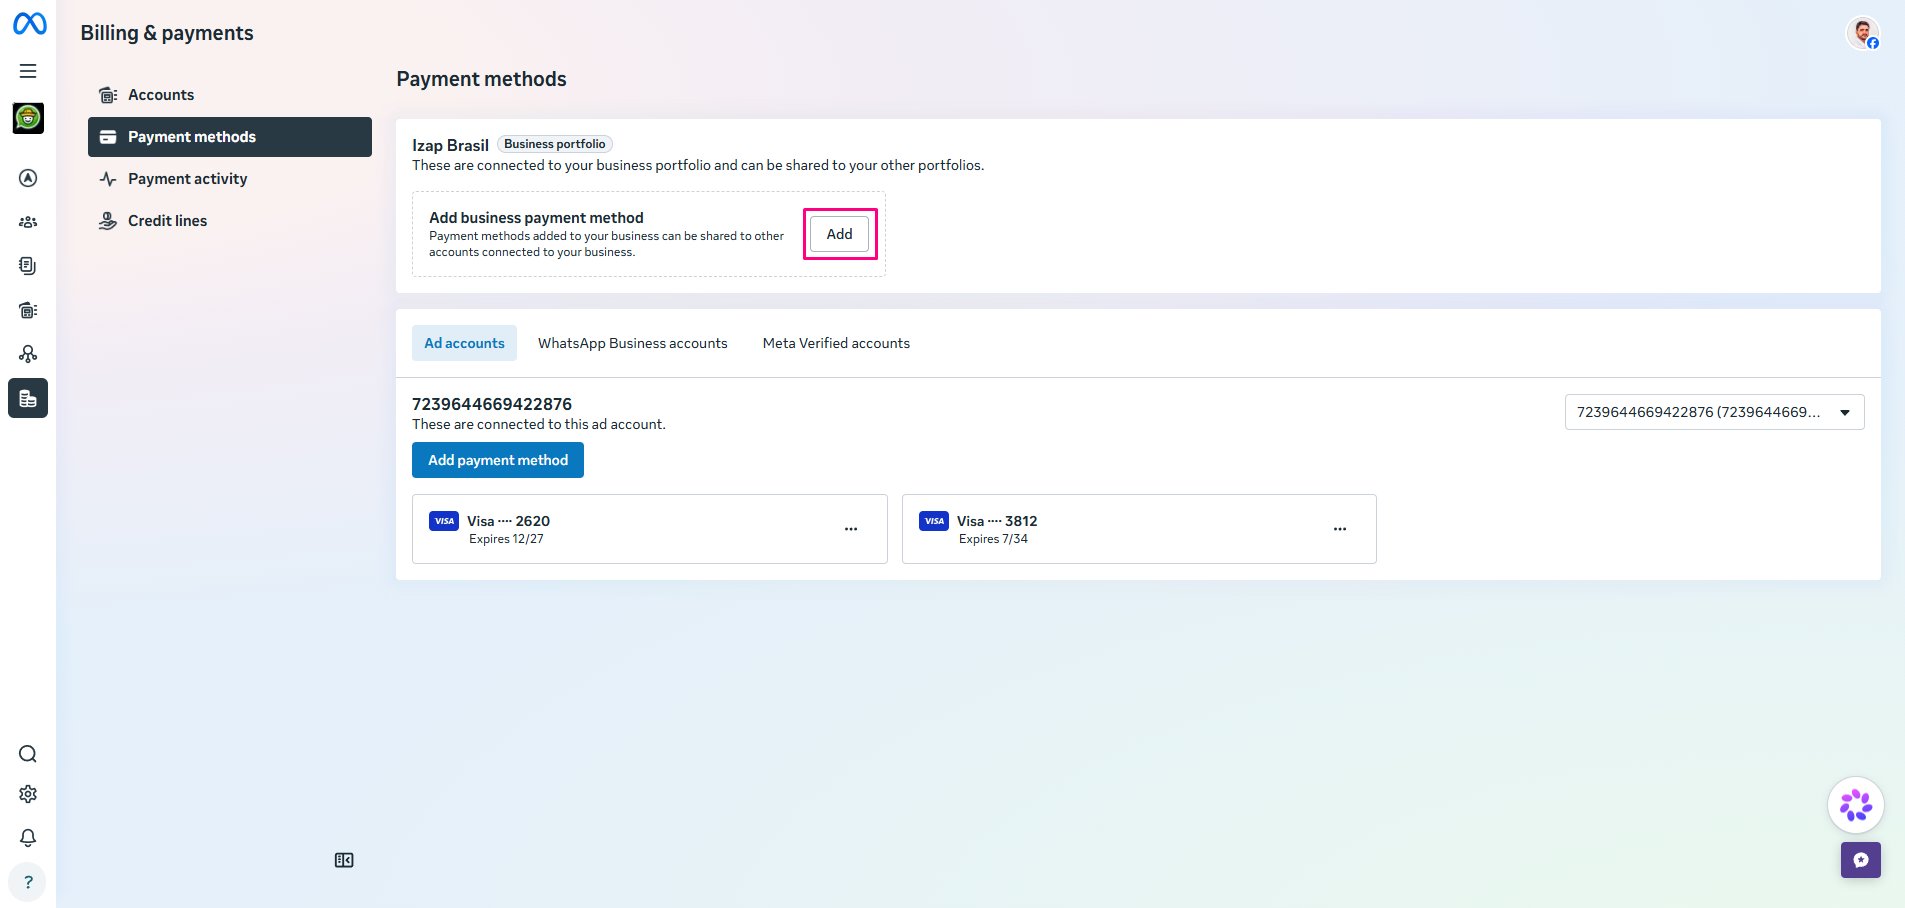 1. Click the **Add payment method** button in the "Payment methods" section.
2. Register a valid credit or debit card.
No charge is made to your card during this registration. This is a standard
account-verification procedure required by Meta.
1. Click the **Add payment method** button in the "Payment methods" section.
2. Register a valid credit or debit card.
No charge is made to your card during this registration. This is a standard
account-verification procedure required by Meta.